First .NET Core project using CLI
Let's create our first .NET Core project using CLI and understand the initial file structure.
In this post I'm assuming that you already know how to set up your development environment and already installed all we need to create our first project and continue our training.
The following command will create an empty project into the products-api directory. It is noteworthy to mention that you can also create projects using predefined templates.
dotnet new web -o products-apiNow, let's open the project with VS Code.
code products-apiThe project directory must contain these files:
- *.csproj: Project configuration file.
- appsettings.json: Configuration file for the packages (libraries or frameworks) added to the project.
- appsettings.Development.json: Overwrites the
appsettings.jsonfile when the project runs in the development environment. - Startup.cs: Class used to define which and how the services of the packages added to the project will be used.
- Program.cs: Class used by
dotnettool to start the project.
I'll introduce you these files, but we will naturally deepen during the training. You may notice the bin and obj folders. These folders are the location where the binaries go after compiling the project source code.
*.csproj
The project configuration is maintained in this XML format file. Through this file we can add or remove NuGet packages, include or exclude files on publish, set .NET Core version, change the default namespace of the classes, and so on.
Let's change the namespace in the RootNamespace element to follow the naming conventions for namespaces (UpperCamelCase). Following the naming convention improves the reading of the source code by other people on the team, making it easier to identify what represents a certain part of the code (attribute, property, constant, etc), among other benefits.
After doing that your products-api.csproj file should look like this:
<Project Sdk="Microsoft.NET.Sdk.Web">
  <PropertyGroup>
    <TargetFramework>netcoreapp2.2</TargetFramework>
    <AspNetCoreHostingModel>InProcess</AspNetCoreHostingModel>
    <RootNamespace>ProductsApi</RootNamespace>
  </PropertyGroup>
  <ItemGroup>
    <PackageReference Include="Microsoft.AspNetCore.App" />
    <PackageReference Include="Microsoft.AspNetCore.Razor.Design" Version="2.2.0" PrivateAssets="All" />
  </ItemGroup>
</Project>
appsettings.json
In this JSON format file we maintain the packages configuration when needed. You can have a file that contains the common settings for all environments and create a specific file for each environment: development, staging, production.
Your appsettings.json file should look like this:
{
  "Logging": {
    "LogLevel": {
      "Default": "Warning"
    }
  },
  "AllowedHosts": "*"
}
Program.cs
Our project is actually a console project. It will be initiated by the .NET Core by invoking the static method Main().
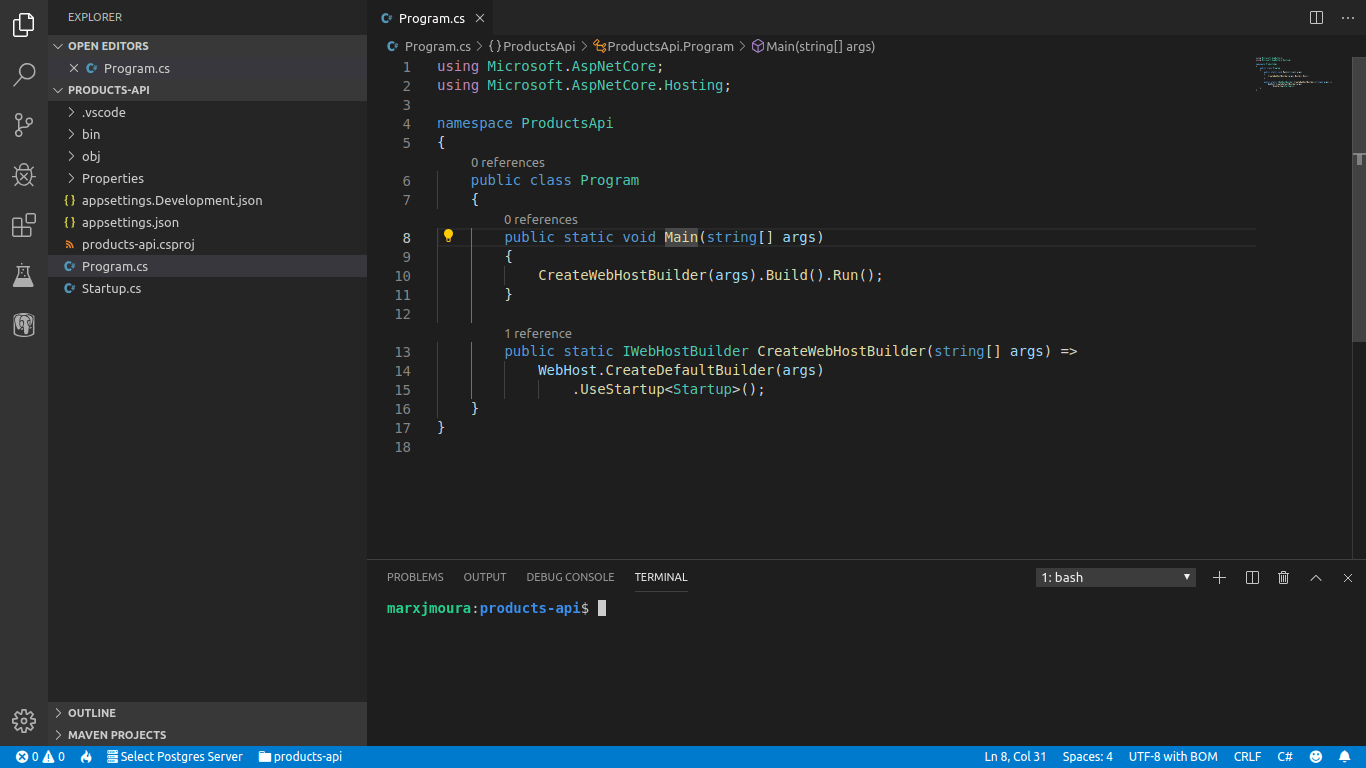
We will remove the unnecessary using directives and update the namespace. Remove the unnecessary directives is one more step to keep our code clean. Your Program.cs should look like this:
using Microsoft.AspNetCore;
using Microsoft.AspNetCore.Hosting;

namespace ProductsApi
{
    public class Program
    {
        public static void Main(string[] args)
        {
            CreateWebHostBuilder(args).Build().Run();
        }

        public static IWebHostBuilder CreateWebHostBuilder(string[] args) =>
            WebHost.CreateDefaultBuilder(args)
                .UseStartup<Startup>();
    }
}
Startup.cs
We will use this class to configure the services and dependencies used by other classes in the project through the dependency injection (DI) design pattern. You will see these two methods which basically mean:
- ConfigureServices: Add services to the IoC container. The service configuration can be read from
appsettings.jsonfile. - Configure: Use one or more configured services as a middleware into the request pipeline to process the response.
You can read the Microsoft documentation to know more details about the Startup class, dependency injection and middlewares.
We will remove the unnecessary using directives and update the namespace. Your Startup.cs should look like this:
using Microsoft.AspNetCore.Builder;
using Microsoft.AspNetCore.Hosting;
using Microsoft.AspNetCore.Http;
using Microsoft.Extensions.DependencyInjection;

namespace products_api
{
    public class Startup
    {
        public void ConfigureServices(IServiceCollection services)
        {
        }

        public void Configure(IApplicationBuilder app, IHostingEnvironment env)
        {
            if (env.IsDevelopment())
            {
                app.UseDeveloperExceptionPage();
            }

            app.Run(async (context) =>
            {
                await context.Response.WriteAsync("Hello World!");
            });
        }
    }
}
Run the project by pressing F5 in VS Code. Now, open your browser and access http://localhost:5000 (default port of the ASP.NET Core applications). You should see the text Hello World!.
It is also possible run the project directly from CLI, but in this way we will not be able to debug with VS Code. From the root project directory (where is the csproj file) run the following command:
dotnet runIn the next post we'll start talking about RESTful API, MVC pattern and create our first endpoint that will respond in JSON format.